

Leveling a Warlock from 1 to 60 in WoW Forever is about much more than casting damage spells and sending a demon into combat. Warlocks have one of the most distinctive leveling experiences in the game because they combine damage-over-time spells, direct damage, demon companions, life and mana management, curses, crowd control, and the ability to turn health into a resource for continued combat.
Unlike classes that must stop after every few enemies to recover, a well-played Warlock can often defeat one enemy, move immediately to another, and keep progressing with relatively little downtime. Your demon can absorb attacks, your damage-over-time effects continue working after you cast them, and abilities that exchange health for mana can help maintain momentum when used carefully.
However, Warlocks also have a learning curve. Applying too many damage-over-time effects to a nearly defeated enemy wastes mana. Sending a demon into the wrong group can turn a controlled pull into a dangerous encounter. Using Life Tap without considering your remaining health can leave you vulnerable, while ignoring your pet’s health, happiness, or other version-specific management requirements can interrupt your leveling rhythm.
The best Warlock leveling strategy is therefore not simply to maximize damage. It is to maintain a repeatable combat cycle that balances damage, demon control, resource efficiency, survival, and movement between objectives.
This complete WoW Forever Warlock leveling guide explains how to approach the journey from level 1 to 60, how to think about Affliction, Demonology, and Destruction, how to choose and manage your demon, which attributes matter while leveling, and how to organize your questing and dungeon sessions for consistent progress.
More info: https://mewe.com/wowforevergold
Whether you are creating your first Warlock or developing another character, the goal is the same: understand the class well enough that every pull becomes more predictable, every spell has a purpose, and every level makes your character more effective.
1. Why Warlock Is One of the Most Interesting Classes to Level in WoW Forever
Warlock is a ranged spellcasting class that uses demonic companions, curses, damage-over-time effects, and direct-damage spells to defeat enemies. Its defining characteristic is the ability to deal damage through several sources at once.
A Warrior generally relies on weapon attacks and Rage. A Mage relies on spell damage, Mana, and defensive magic. A Warlock combines spellcasting with a demon companion that can contribute damage, absorb enemy attacks, or provide utility depending on the demon and the situation.
This creates a distinctive combat pattern.
You do not necessarily need to stand still and repeatedly cast your strongest direct-damage spell. Instead, you can apply an appropriate damage-over-time effect, allow your demon to engage the enemy, and use the remaining time to cast additional spells or prepare for the next action.
That flexibility is particularly valuable during long leveling sessions.
The Warlock’s Main Advantages
Sustained damage: Damage-over-time spells can continue hurting enemies while you perform other actions. Once you understand which effects are worth applying to a particular target, you can distribute your damage efficiently.
Demon assistance: Your demon gives you an additional combat tool. Depending on the demon and its available abilities, it may contribute damage, generate threat, provide defensive support, or interrupt an enemy’s actions.
Resource flexibility: Life Tap and related mechanics can help convert health into Mana, reducing the need to wait for natural Mana regeneration. The exchange is not free, however, and must be managed carefully.
Range: Warlocks can begin many encounters before an enemy reaches melee range. This gives you time to apply spells, position your character, and let your demon establish control.
Multiple approaches to combat: Affliction emphasizes damage-over-time effects, Demonology focuses on demon-related talents and other supportive mechanics, and Destruction emphasizes direct spell damage. The exact value of each specialization depends on the current WoW Forever implementation.
Solo flexibility: A suitable demon, sensible target selection, and efficient spell usage can make the Warlock comfortable for extended solo questing.
The Main Challenges
Warlock is not automatically easy simply because it has a demon.
You still need to manage several connected systems:
- Health and Mana must be considered together.
- Your demon must be controlled rather than treated as an independent character.
- Damage-over-time spells need enough time to produce value.
- Threat can become a problem if your damage exceeds your demon’s ability to hold an enemy’s attention.
- Multiple enemies can overwhelm you if you apply effects indiscriminately.
- Some enemies have resistances, dangerous abilities, or mechanics that make a standard rotation inefficient.
- Travel, training, equipment upgrades, and consumables all affect the pace of progression.
The difference between an inefficient Warlock and an efficient one often comes down to decisions made before and during combat.
The Basic Warlock Leveling Formula
A productive leveling routine can be summarized as follows:
Prepare → Select a target → Position your demon → Apply efficient spells → Control threat → Finish the enemy → Recover intelligently → Move to the next objective.
The routine is simple, but each step matters.
Before a fight, check your health, Mana, demon, and surroundings. During combat, use enough spells to defeat the enemy without wasting resources. After combat, recover only as much as necessary before moving forward.
The objective is not to make every encounter spectacular. It is to make ordinary encounters reliable.
2. Which Warlock Specialization Should You Choose for Leveling?
Warlocks have three traditional talent trees: Affliction, Demonology, and Destruction.
Each offers a different way to approach combat. Affliction concentrates on curses and damage-over-time effects. Demonology improves aspects of demon-related gameplay and can provide additional durability or synergy depending on the talents available. Destruction focuses more heavily on direct spell damage and offensive casting.
For a character leveling alone, Affliction is a strong starting recommendation to evaluate first because its general design supports sustained damage and efficient movement between targets. However, the best build for WoW Forever depends on the actual talent descriptions, ability changes, creature health, and leveling balance in the version you play.
Do not assume that every talent or ability behaves exactly as it does in an older version of World of Warcraft.

Affliction: Sustained Damage and Efficient Questing
Affliction is built around effects that damage enemies over time.
Instead of spending your entire Mana pool on immediate damage, you apply selected effects and allow them to work while your demon attacks. You can then use direct-damage spells when an enemy needs to be finished quickly or when an opportunity justifies the extra Mana expenditure.
Affliction can be attractive for solo leveling because it rewards planning and allows damage to continue while you perform other actions.
Its main weakness is overapplication. If you apply several long-duration effects to an enemy that is already almost defeated, much of their potential damage may never occur.
Affliction works best when you understand the expected lifespan of your target and choose spells accordingly.
More info: https://www.meetup.com/members/484807569/
Demonology: Building Around Your Demon
Demonology focuses on the Warlock’s relationship with demonic companions.
Depending on the available talent changes, this specialization may improve demon damage, survivability, utility, or the Warlock’s ability to work alongside a summoned companion.
Its value depends on the content you are doing. A talent that helps your demon survive repeated attacks may be valuable during difficult solo quests. A talent that increases damage may be more attractive when enemies are easy to defeat and the demon is already safe.
Demonology is worth considering if you enjoy controlling a companion, prefer a demon-centered playstyle, or want to explore a different approach to the traditional Affliction leveling routine.
Before committing to a specific talent order, inspect the current talent tooltips. Do not spend points based solely on an old guide that assumes unchanged mechanics.
Destruction: Direct Damage and Burst Potential
Destruction emphasizes direct-damage spells.
Its appeal is straightforward: some encounters benefit from quickly concentrating damage on one target instead of waiting for several effects to tick.
This can be useful against enemies with short engagement windows, targets that must be defeated quickly, or group encounters where coordinated burst damage is valuable.
However, direct damage can demand more Mana and more stationary casting. If your spell usage causes you to recover after every encounter, your damage per cast may be impressive while your overall leveling pace remains disappointing.
Destruction is not necessarily a poor leveling choice. It simply asks you to pay closer attention to casting time, Mana expenditure, and how quickly your demon can control the enemy.
Specialization Comparison
| Consideration | Affliction | Demonology | Destruction |
|---|---|---|---|
| General combat identity | Damage over time | Demon-centered play | Direct spell damage |
| Solo questing | Strong candidate | Strong candidate with suitable talents | Viable with careful resource management |
| Main efficiency consideration | Avoid excessive damage-over-time applications | Keep demon and talent synergies useful | Balance burst with Mana cost |
| Target selection | Enemies that survive long enough for effects to matter | Encounters where demon support has value | Targets that benefit from concentrated damage |
| Common mistake | Applying too many effects | Assuming every demon-related talent is automatically useful | Casting expensive spells without considering recovery |
| Recommended approach | Begin with a sustainable damage-over-time routine | Build around the actual demon mechanics available | Use direct damage selectively and deliberately |
These are general playstyle comparisons, not a verified ranking of current WoW Forever talent builds.
A Practical Recommendation
For a first Warlock, begin by learning the class’s core spells and demon controls before trying to optimize every talent point.
Once you understand how much damage your effects produce, how much Mana you spend, and how your demon behaves, you can make better decisions about specialization.
A good build should improve a combat routine that already makes sense. It should not be expected to compensate for poor targeting, unnecessary spell casts, or uncontrolled pulls.
3. Understanding the Warlock’s Core Resources
The Warlock’s main resources are Health and Mana, but the demon introduces another important factor: the companion’s ability to remain effective in combat.
These resources interact.
Mana pays for many of your spells. Health is both your survival resource and, through Life Tap where available, a way to obtain additional Mana. Your demon’s health and threat determine whether enemies remain under control.
A strong Warlock considers all three before beginning a fight.
Mana: The Cost of Every Spell
Mana is what allows you to cast many of your offensive and utility abilities.
The mistake is to treat Mana as something that must always remain near full. If you finish an encounter with abundant Mana but could have defeated the target more efficiently, you may be spending too much time recovering.
The opposite mistake is to spend everything on the first enemy and then struggle through the next encounter.
The ideal amount of Mana to spend depends on the situation.
More info: https://www.filmaffinity.com/us/userlists.php?user_id=5604051
Against an ordinary enemy, you may need only a small set of effects. Against a difficult elite, you may deliberately spend more Mana to reduce the danger of the fight. In a dungeon, your available Mana must also account for the possibility that another enemy or boss encounter follows immediately.
Health: More Than a Survival Bar
Health is especially important because Life Tap can exchange health for Mana.
This does not mean health is expendable in every situation. It means health and Mana should be considered as a combined resource system.
Using Life Tap when you are safe and have access to recovery can improve efficiency. Using it while surrounded by enemies or before a dangerous encounter can leave you vulnerable.
Your remaining health must be enough to survive foreseeable damage, including damage caused by enemies switching targets, unexpected patrols, or a demon losing control of the fight.
Demon Health and Threat
Your demon is not simply an additional damage spell.
It is an active part of your combat plan. Depending on the demon, its abilities, and the current rules, it may be able to absorb attacks, generate threat, interrupt or otherwise disrupt enemies, or contribute additional damage.
If your demon is struggling to survive, continuing to send it into difficult encounters without changing your approach can increase downtime.
If your demon is not holding threat, you may need to reduce your damage temporarily, change your target, or use the appropriate defensive or control ability.
Resource Priority by Situation
| Situation | Main priority | Practical decision |
|---|---|---|
| Easy ordinary enemy | Efficient damage | Use only the spells needed to finish the target |
| Enemy with high health | Sustained efficiency | Apply effects that have time to produce value |
| Difficult enemy | Survival and control | Use a safer pull and retain emergency options |
| Low Mana after combat | Sustainable recovery | Consider whether Life Tap is safe before using it |
| Low health | Avoid unnecessary risk | Recover before taking another dangerous pull |
| Demon under pressure | Companion survival | Reduce incoming damage or adjust the encounter |
| Dungeon boss approaching | Group readiness | Recover and coordinate before starting |
The Best Resource Habit
After each encounter, ask three questions:
- Did I spend more Mana than necessary?
- Did I take avoidable damage?
- Could I safely begin the next encounter without a full recovery?
This small review helps identify the real cause of downtime.
If your Mana disappears quickly, the solution may be fewer unnecessary spells rather than more frequent Life Tap use. If your health drops too low, the problem may be poor demon control or an aggressive pull. If your demon repeatedly loses control, you may need to adjust the order of your attacks.
The goal is a stable rhythm, not maximum resource bars at every moment.
4. Warlock Talents: How to Build for Levels 10–60
Talent points begin to shape your character’s identity as you progress. The most effective way to choose talents is to identify what makes your preferred combat routine work and then invest in talents that improve that routine.
For Affliction, that usually means looking at damage-over-time effects, resource efficiency, and relevant defensive or utility talents.
For Demonology, it means evaluating the actual improvements available for your demon and the interaction between the demon and your spells.
For Destruction, it means considering direct spell damage, critical strikes, casting efficiency, and other improvements that are relevant to the spells you actually use.
Do Not Choose Talents by Name Alone
A talent can sound powerful but provide little benefit to your current routine.
For example, a talent that improves a spell you rarely cast may be less useful than a modest improvement to a spell used in nearly every encounter.
Likewise, a defensive talent may save time over a long leveling session if it prevents repeated deaths or reduces recovery. Its value cannot always be measured by the damage shown on a single combat log.
Read the full tooltip, check its prerequisites, and consider how often its effect will matter.
Levels 10–19: Establish Your Core Identity
Your first talent points should support the basic combat routine you want to use.
If you prefer Affliction, focus on improvements that strengthen your regular damage-over-time approach or improve its efficiency.
If you prefer Demonology, determine which early talents make your demon more useful during ordinary questing.
If you prefer Destruction, identify the early improvements that support the direct-damage spells you can use consistently.
Avoid distributing points randomly across all three trees simply because each contains an interesting ability.
More info: https://www.goodwall.io/wow-forever-gold-3e12
Early specialization is not about predicting every encounter you will face at level 60. It is about making your current character more effective without investing in effects you cannot yet use properly.
Levels 20–29: Improve Your Combat Rhythm
By this stage, you should have enough experience to identify the weaknesses of your routine.
Are you spending too much Mana? Does your demon struggle to hold enemies? Do targets die before your damage-over-time effects finish? Do you have trouble against enemies that approach you quickly?
Your talent choices should respond to those observations.
A player who frequently loses control of difficult encounters may benefit more from a relevant defensive or control improvement than from a small increase in theoretical damage.
A player who comfortably survives but spends too long recovering may want to prioritize talents that improve sustained efficiency.
Levels 30–39: Specialization Becomes More Noticeable
As you progress, talent combinations and stronger abilities can make your chosen specialization more distinctive.
At this point, revisit your build rather than assuming the same priorities remain ideal forever.
Your enemies may have more health. You may encounter more dangerous abilities. Your demon may need additional support, or your damage-over-time effects may become more valuable against targets that survive longer.
Look at your actual combat experience.
A useful talent is one that changes what happens in real encounters, not merely one that looks impressive on a character planner.
Levels 40–49: Refine Rather Than Rebuild Randomly
At higher levels, the cost of changing a poorly planned build may become more noticeable.
Review your current talent choices and decide whether they still support your goals.
If you are leveling mostly alone, prioritize consistency and survival alongside damage. If you are spending substantial time in dungeons, some talents may be more valuable because group encounters differ from solo questing.
If your build is already working well, there may be little reason to change it dramatically.
Levels 50–60: Prepare for the Endgame
The final leveling stretch is a good time to decide how you want to approach level 60.
A build optimized for moving quickly through ordinary enemies is not necessarily the same as a build optimized for a specific dungeon, raid, or PvP environment.
Think about your intended activities:
- Solo farming and questing
- Dungeon damage
- Group utility
- Demon-centered gameplay
- Direct spell damage
- Sustained damage-over-time effects
Use the remaining talent points to improve your intended role, while verifying the exact talent effects in the current game.
More info: https://www.blurb.com/user/wowforever
Talent Planning Graph
The following conceptual graph illustrates how to think about talent priorities across the leveling journey. It is not a measured damage simulation or a verified build calculator.
LEVELING TALENT PRIORITIES

Levels 10–19
Core spell or demon synergy       ██████████
Basic efficiency                  ████████
Situational utility               ██████
Endgame-only optimization         ███

Levels 20–29
Core specialization synergy       ██████████
Resource efficiency               ████████
Survivability                     ███████
Narrow endgame specialization     ████

Levels 30–39
Established combat routine        ██████████
Specialization scaling            █████████
Survivability and control         ████████
Unnecessary talent experimentation ███

Levels 40–49
Consistent damage                 █████████
Resource management               █████████
Group or solo specialization      ████████
Unplanned respecialization        ███

Levels 50–60
Chosen endgame role               ██████████
Reliable damage and utility       █████████
Gear and talent synergy           █████████
Unused situational effects        ████
The Main Talent Rule
Do not ask only, “Which talent gives me the most damage?”
Ask, “Which talent helps me defeat the enemies I actually fight, while spending less time recovering and reducing the risk of failed encounters?”
That question produces more useful leveling decisions.
5. Choosing the Right Demon for Each Situation
Your demon is one of the most important parts of Warlock gameplay.
The available companions traditionally include the Imp, Voidwalker, Succubus, Felhunter, and Infernal-related or other summons depending on the game version, class mechanics, and circumstances. Their availability and abilities must be verified in the version you play.
Different demons serve different purposes. Choosing one based only on its damage can be a mistake if another companion offers more valuable control or defensive support for your current objective.
The Imp: Ranged Support
The Imp is traditionally a ranged demon that contributes spell damage and can provide group utility through abilities available in the relevant version.
It can be useful when you want additional damage without relying on the demon to absorb every attack.
However, ranged damage does not automatically make the Imp the safest option for every solo encounter. If an enemy quickly reaches you, you may need a plan for managing threat and protecting yourself.
Use the Imp when its damage and available utility suit the encounter.
The Voidwalker: Defensive Support
The Voidwalker is traditionally associated with durability and abilities that help it absorb or control enemy attention.
For many solo Warlocks, this makes the Voidwalker a natural option to consider when learning the class.
Its value is particularly clear when fighting enemies that would otherwise spend much of the encounter attacking you.
The Voidwalker is not invulnerable. Strong enemies, multiple attackers, or poorly managed pulls can still overwhelm it.
If you use the Voidwalker as your primary solo companion, monitor its condition and adjust your damage output if necessary.
The Succubus: Damage and Situational Control
The Succubus traditionally offers offensive abilities and forms of crowd control.
It can be useful when its damage and utility match your goals, particularly when you understand how to manage enemies without relying entirely on a defensive demon.
The trade-off is that a more offensive companion may not provide the same level of defensive support as a tank-oriented option.
Consider the enemy type, the amount of incoming damage, and whether the Succubus’s available control abilities are useful in the encounter.
The Felhunter: Utility and Spell-Related Support
The Felhunter is traditionally associated with utility such as spell interruption or dispelling effects, depending on the game’s ability rules.
That makes it particularly interesting when fighting spellcasters or participating in group content where its utility has practical value.
It may be less attractive than another demon in situations where those abilities do not matter and a different companion better supports your normal combat pattern.
The important point is to select the demon for the encounter rather than assuming one companion must be best everywhere.
Demon Selection Table
| Situation | Demon to consider | Why |
|---|---|---|
| Learning solo questing | Voidwalker | Traditionally provides defensive support |
| Enemies that cast dangerous spells | Felhunter, if its relevant utility is available | Spell-related utility may improve control |
| Encounters emphasizing ranged damage | Imp | Ranged damage may suit the situation |
| Situations favoring offensive pressure or control | Succubus | Offensive and control abilities may be useful |
| Group encounters | Depends on group composition | Utility, damage, and encounter mechanics matter |
| Difficult elite enemies | Usually prioritize reliable control and survival | A theoretical damage advantage is not worth repeated failures |
This table is a general decision aid, not a verified current-client ranking.
Keep Your Demon Effective
A demon that is alive, properly controlled, and suited to the encounter is more valuable than a theoretically stronger demon that repeatedly loses control.
Develop the habit of checking your companion before combat.
More info: https://able2know.org/user/wowforevergold/
Make sure the appropriate abilities are available, understand its behavior, and know how to stop or redirect it when necessary.
Do not assume that every demon ability should be used automatically. Some abilities may have resource costs, cooldowns, or situational restrictions.
Your demon is a tool you control. The more deliberately you use it, the more predictable your leveling becomes.
6. The Core Warlock Combat Rotation
Warlock combat is not best understood as a rigid sequence that must be repeated against every enemy.
The right spell order depends on the target’s health, the time it is likely to survive, your Mana, your demon, and the danger of the encounter.
A low-health enemy may not need every available damage-over-time effect. A durable enemy may justify several effects because they have enough time to deal meaningful damage. A dangerous enemy may require control or defensive preparation before you commit to damage.
Step One: Select the Right Target
Before attacking, inspect the enemy and its surroundings.
Ask yourself:
- Is the target alone?
- Is another enemy likely to join the fight?
- Is it a caster or melee attacker?
- Can my demon handle it safely?
- Is the target close to other players or patrol routes?
- Do I need a particular item or objective from this enemy?
These questions take very little time and can prevent costly mistakes.
Step Two: Let Your Demon Establish Control
If you are using a demon for defensive support, allow it to engage and establish a useful level of threat before committing to your strongest attacks.
If you immediately use high-threat spells, the enemy may switch to you.
Once that happens, your demon may no longer be providing the defensive value you expected.
This does not mean you should wait unnecessarily during every encounter. The objective is to give your companion enough opportunity to perform its role without wasting valuable combat time.
Step Three: Apply Appropriate Damage-Over-Time Effects
Affliction-style combat revolves around choosing the right effects for the target.
Corruption and other available damage-over-time spells can contribute damage while you cast other abilities or prepare for subsequent actions.
However, applying every effect to every enemy is not automatically efficient.
A spell’s value depends on the amount of damage it can deliver before the target dies, its Mana cost, its casting time, and whether the enemy will remain alive long enough for the effect to matter.
Step Four: Use Direct Damage When It Makes Sense
Direct-damage spells can finish targets quickly or provide additional pressure against durable enemies.
They are particularly relevant when waiting for damage-over-time effects would delay the kill unnecessarily.
However, direct damage should be considered in the context of the entire encounter.
If you spend a large amount of Mana to finish an ordinary enemy only slightly faster, the next encounter may take longer because you need to recover.
Step Five: Finish the Target Efficiently
As the enemy approaches defeat, stop applying effects that cannot reasonably produce enough additional damage to justify their cost.
This is one of the most important Warlock habits.
Damage-over-time spells are powerful when they have time to work. They are wasteful when you repeatedly apply them to enemies that are about to die.
A Simple Affliction-Oriented Routine
The following sequence is a general example, not a guaranteed optimal rotation for every WoW Forever build:
- Check your health, Mana, demon, and surroundings.
- Send your demon to engage the intended target.
- Allow the demon to establish control where appropriate.
- Apply the most useful damage-over-time effect or effects.
- Use direct damage if it will shorten the fight efficiently.
- Monitor your demon’s health and the enemy’s target.
- Finish the enemy without unnecessary extra casts.
- Evaluate your resources before starting another encounter.
Combat Decision Graph
                    SELECT ENEMY
                         |
                         v
              CHECK SURROUNDINGS
                         |
             +-----------+-----------+
             |                       |
             v                       v
      SAFE, SINGLE TARGET       DANGEROUS PULL
             |                       |
             v                       v
      SEND DEMON                  REPOSITION
             |                       |
             v                       v
      APPLY USEFUL DOTs        CONTROL OR ABORT
             |                       |
             v                       v
      MONITOR THREAT           REASSESS TARGET
             |
             v
      ADD DAMAGE IF NEEDED
             |
             v
      FINISH EFFICIENTLY
             |
             v
      CHECK RESOURCES
             |
             v
      NEXT OBJECTIVE
The most important decision occurs before the first spell: determining whether the encounter is safe and worthwhile.
Do Not Confuse a Rotation With a Script
A rotation is a framework for choosing actions, not a requirement to press the same buttons regardless of circumstances.
If the enemy has very little health, use fewer spells. If it has a dangerous ability, prioritize control or survival. If your demon is struggling, adjust your damage or positioning. If your Mana is low, avoid expensive actions that do not materially improve the outcome.
Good Warlock play is adaptive.
7. Damage-Over-Time Spells: The Foundation of Efficient Affliction
Damage-over-time effects are one of the defining mechanics of Affliction.
Instead of dealing all their damage immediately, these spells apply an effect that deals damage over a period of time. This allows the Warlock to contribute damage while performing other actions.
Their efficiency depends on timing.
A damage-over-time spell can be excellent against a durable enemy and inefficient against a target that will die before the effect has time to complete.
Understand the Enemy’s Expected Lifespan
Consider two hypothetical enemies.
Enemy A is weak and usually dies within a few seconds. Enemy B is durable and remains alive for a much longer period.
A long-duration damage-over-time effect may deliver only a small portion of its potential damage against Enemy A. The same effect may deliver most or all of its damage against Enemy B.
The spell has not changed. The target’s lifespan has changed.
This is why the best Warlock rotation depends on the encounter.
The Damage-Over-Time Efficiency Principle
Think of the value of an effect as a relationship between damage delivered and resources spent.
A simple conceptual model is:
Effective spell value = damage actually delivered ÷ total cost of using the spell.
The total cost includes Mana, casting time, and any additional risk created by the action.
This is not an official game formula. It is a useful way to think about spell efficiency.
If an effect costs Mana but most of its potential damage is wasted, its effective value falls.
If the effect runs its full duration against a durable target, it may provide much better value.
More info: https://creator.wonderhowto.com/wowforevergold/
When to Refresh an Effect
Refreshing a damage-over-time effect too early may waste the remaining duration of the existing effect, depending on the mechanics of the current version.
Waiting too long may allow the effect to expire and create a gap in damage.
The appropriate timing depends on the spell’s current behavior, duration, and any relevant talent effects.
Learn the actual tooltip and observe how the spell behaves in your client rather than assuming that every version uses identical rules.
Avoid Applying Everything Automatically
A common beginner mistake is to apply every available damage-over-time effect to every target.
This may feel productive because several damage numbers appear on the screen, but it can increase Mana costs and slow down the overall leveling process.
Use a smaller spell package against weak enemies and reserve more extensive applications for durable targets.
That approach helps maintain a consistent pace without sacrificing effectiveness against harder enemies.
8. Life Tap, Drain Life, and the Health–Mana Balance
Warlocks have a distinctive relationship with Health and Mana.
Life Tap traditionally converts health into Mana, while Drain Life can damage an enemy and restore health according to the relevant version’s mechanics.
These abilities create opportunities for efficient resource management, but they also create risks if used without considering the situation.
Life Tap: Convert Health Into Mana Carefully
Life Tap can help you continue casting when Mana is low.
However, the health spent is real. If you use Life Tap repeatedly while surrounded by enemies or before a difficult encounter, you may enter combat without enough health to survive unexpected damage.
The correct decision depends on the immediate danger and the recovery options available.
Before using Life Tap, ask:
- Am I currently safe?
- How much health will remain afterward?
- Is an enemy likely to attack me before I can recover?
- Is my demon healthy enough to help control the next encounter?
- Could I recover more safely before moving forward?
Life Tap is a resource tool, not a substitute for situational awareness.
Drain Life: Damage and Recovery
Drain Life traditionally deals damage while restoring some of the Warlock’s health.
Its usefulness depends on the current spell implementation, target, talents, and situation.
It may help sustain you during combat, but channeling a spell has an opportunity cost. You may give up another action while the channel is active.
Against a weak enemy, finishing the target with a more efficient action may be preferable. Against a durable target, the combination of damage and healing may be more attractive.
Evaluate the entire encounter rather than assuming that healing during combat is always the fastest option.
Use Health and Mana as a Combined Budget
Imagine that you finish a fight with moderate health and low Mana.
You have several options: use Life Tap, recover naturally, use an appropriate recovery item, or choose a safer enemy that allows you to rebuild resources gradually.
The best choice depends on the next objective.
If you are about to fight a difficult elite, recovering first may be sensible. If you are clearing ordinary enemies in a safe area, a carefully managed resource exchange may maintain your pace.
A Practical Recovery Routine
After an ordinary encounter:
- Check whether your health is safe for another pull.
- Check whether your Mana is sufficient for the spells you actually need.
- Check your demon’s condition.
- Use an appropriate recovery method if necessary.
- Begin the next fight only when the risk is acceptable.
Do not insist on restoring every resource to maximum after every encounter. Equally, do not begin dangerous fights simply because your next objective is nearby.
The goal is to avoid both unnecessary waiting and avoidable deaths.
9. Choosing Between Single-Target and Multi-Target Combat
Warlocks can sometimes manage several enemies by distributing damage-over-time effects and using their demon to help control the encounter.
That does not mean pulling multiple enemies is always faster.
Every additional enemy increases incoming damage, adds another target to manage, and creates a greater chance that your demon will lose control of the situation.
Multiple-target combat is most useful when the enemies are weak enough, the area is safe enough, and your available abilities can handle the added pressure.
Single-Target Combat
Single-target combat is generally the more predictable option.
You can focus your damage, monitor one enemy’s health, and make decisions without constantly switching between several threats.
It is particularly appropriate when:
- Enemies have dangerous special abilities.
- You are learning a new zone.
- Your demon is already taking substantial damage.
- You have limited health or Mana.
- Nearby enemies are likely to join the fight.
- The target is a difficult quest enemy.
Single-target combat may be slower per enemy but faster across an entire session if it reduces deaths and recovery.
Multi-Target Combat
Multi-target combat can improve efficiency when several weak enemies can be handled together.
Damage-over-time effects may allow you to damage multiple targets while your demon and other abilities contribute to the encounter.
However, each additional target must justify its cost.
If adding a second enemy doubles the incoming pressure but provides only a small increase in experience, the pull may be inefficient.
If several weak enemies can be defeated safely with little additional recovery, the same approach may be productive.
Pull Size Decision Table
| Condition | Recommended approach |
|---|---|
| One enemy is already challenging | Start with one target |
| Several enemies are tightly grouped | Assess whether an extra target can be controlled safely |
| Demon is low on health | Avoid expanding the pull |
| Health and Mana are low | Recover or choose a safer encounter |
| Enemies have dangerous crowd-control abilities | Favor controlled single-target pulls |
| You have experience with the area and your build | Consider carefully managed multi-target combat |
| A patrol may join unexpectedly | Leave space and reduce the initial pull size |
The Best Rule for Faster Leveling
Increase your pull size only when you can handle the extra pressure without creating disproportionate recovery time.
A controlled pull that takes a little longer is often better than an aggressive pull that ends with a long recovery or a death.
10. Levels 1–10: Learning the Basics of Warlock Combat
The first ten levels establish the habits that will shape your entire leveling experience.
At this stage, you are learning how to cast spells efficiently, how to manage your early resources, how to choose targets, and how to use the abilities available to your character.
Do not worry about mastering every advanced mechanic immediately.
Focus on understanding what each spell does and how it fits into a basic combat routine.
Learn Your Starting Spells
Read the tooltips of your starting abilities.
Identify which spells deal direct damage, which apply effects over time, which provide utility, and which affect your health or Mana.
Understanding these differences helps you avoid using every spell in every encounter.
A low-health enemy may need only a simple attack. A durable target may justify a more involved sequence.
More info: https://dzone.com/users/5617077/wowforevergold.html
Practice Controlled Pulls
Choose enemies that are appropriate for your current level and equipment.
Avoid attacking several enemies simultaneously until you understand how much damage you take and how your available abilities work.
Use the environment to your advantage. Give yourself room to move and avoid pulling enemies from dense groups when you can engage them separately.
Learn to Watch Your Health
Early Warlock play is a good time to develop disciplined health management.
If your health is low, do not assume that another spell or another Life Tap will solve the problem.
Stop, assess the situation, and recover if necessary.
Establish a Repeatable Routine
A useful early routine is:
- Select a suitable enemy.
- Check the surrounding area.
- Use your available spells efficiently.
- Watch your health and Mana.
- Learn how quickly the target dies.
- Adjust your spell selection for the next enemy.
This process builds practical knowledge that becomes more valuable as enemies grow stronger.
Early-Level Mistakes to Avoid
Do not spend excessive Mana on enemies that are nearly defeated.
Do not assume your demon can handle every encounter without assistance.
Do not begin dangerous fights with low health simply because the enemy is close.
Do not buy every available item from a vendor if doing so leaves you without enough money for essential training.
The early game is about learning efficiency, not chasing a perfect build before you understand the class.
11. Levels 10–20: Develop Your First Real Leveling Strategy
As you progress beyond the starting levels, your Warlock begins to develop a more recognizable combat style.
You can start evaluating which spells provide the most value, how your demon performs against different enemies, and whether your talent choices are improving your routine.
This is the stage where experimentation becomes more useful, provided it is deliberate.
Review Your Spell Costs
Pay attention to how much Mana your usual sequence consumes.
If you repeatedly finish ordinary fights with very little Mana, ask whether every spell was necessary.
You may discover that a simpler sequence is enough for weak enemies while more complex sequences are better reserved for durable targets.
Improve Demon Control
Make sure you understand how to direct your demon and how its behavior changes during combat.
If your demon is intended to absorb enemy attacks, give it an opportunity to establish control where appropriate.
If it is taking too much damage, reconsider the enemy you are fighting or the way you are handling the encounter.
Begin Evaluating Talent Synergy
Choose talents that support the spells and abilities you use most frequently.
A talent that improves a central part of your combat routine can provide value in many encounters. A talent that affects an ability you rarely use may have less practical impact.
Read the actual talent descriptions in your client before spending points.
Explore Questing and Group Content
Questing remains an important way to progress, but group activities may provide useful experience, equipment, or access to objectives that are difficult to complete alone.
Do not assume that every dungeon run is automatically more efficient than questing.
Travel, group formation, waiting, deaths, and competition for objectives all affect the total time required.
More info: https://www.ifixit.com/User/6063552/https:%2F%2FWoW-Forever.gold
Choose activities based on their overall value rather than their reputation.
12. Levels 20–30: Improve Efficiency and Adapt to Stronger Enemies
The twenties are an opportunity to turn a basic combat routine into a more efficient system.
Your character has more experience, your available spells and talents have developed, and you should have a clearer understanding of your preferred demon and specialization.
The main challenge is to adapt as encounters become more demanding.
Reassess Your Damage-Over-Time Applications
Enemies that survive longer may allow damage-over-time effects to deliver more of their potential damage.
That does not mean you should automatically add more spells to every pull.
Instead, compare the value of each effect against the target’s expected lifespan.
If an additional spell consistently improves kill time without creating excessive recovery, it may be worthwhile. If it adds little value against weak enemies, save it for more durable targets.
Identify Dangerous Enemy Types
Some enemies are more dangerous than others even when their levels are similar.
Spellcasters may require different positioning and control from melee enemies. Enemies with powerful special abilities may be better handled individually. Groups with patrols or tightly packed targets may require a more cautious approach.
Learn which encounters your build handles comfortably and which ones deserve additional preparation.
Upgrade Equipment Intelligently
Equipment improvements can increase your effectiveness, but not every new item is an upgrade for your current needs.
Look at the attributes and effects that matter to your build.
For a spellcasting Warlock, relevant offensive statistics may improve damage or casting performance depending on the current rules. Stamina can help provide a larger health buffer, while other attributes may support specific aspects of your build.
Compare items rather than replacing equipment based only on its level or appearance.
Keep Your Travel Efficient
Long periods of travel can reduce experience gained per hour.
When practical, combine quests in the same area, complete nearby objectives together, and avoid unnecessary trips back to a city.
However, do not remain in an area where enemies are too difficult merely to avoid traveling.
A slightly longer journey to a suitable questing area may be more efficient than repeatedly struggling against enemies that are poorly matched to your character.
13. Levels 30–40: Specialization, Control, and Better Pull Planning
By the thirties, the quality of your decisions can matter as much as the number of abilities you have learned.
Your enemies may demand more careful preparation, and the cost of an uncontrolled encounter can become more noticeable.
This is a good time to review your build, demon choice, equipment, and questing habits.
Decide What Your Build Does Best
Your specialization should have a clear purpose.
An Affliction-oriented character may prioritize sustained damage and efficient use of damage-over-time effects.
A Demonology-oriented character may emphasize the benefits available from demon-related talents and companion mechanics.
None of these approaches eliminates the need for good positioning, target selection, or resource management.
Use Control Deliberately
Warlocks traditionally have access to utility and control abilities that can help manage certain enemies.
The exact abilities, restrictions, and effects must be checked in your version of WoW Forever.
When an ability can safely remove an enemy from an encounter or interrupt a dangerous action, it may be more valuable than another damage spell.
However, control abilities often have limitations. They may affect only certain enemy types, break when the target takes damage, or fail against enemies that are immune to the relevant effect.
Understand those restrictions before relying on a control ability in a dangerous situation.
Plan Around Elite Enemies
Before fighting an elite or other difficult target, check the area and prepare your resources.
Make sure your demon is suitable, your health and Mana are sufficient, and you have space to react if the encounter becomes dangerous.
If the enemy is clearly beyond your current capabilities, group with other players or return after gaining levels and improving your equipment.
A difficult encounter is not a test of whether you can keep casting until something happens. It is a decision about whether the fight is worth attempting under the current conditions.
More info: https://docs.google.com/videos/d/1–SlUA6vF_OJ8asOlcQb81NLGfDjzk_OlOF8yAhahXA/play
14. Levels 40–50: Maintain Momentum Without Becoming Careless
The forties are an important stage for players who want to level efficiently without sacrificing consistency.
You should now have a good understanding of your preferred spells, demon, and talent direction.
The challenge is to preserve that efficiency while facing stronger enemies and completing longer quest chains.
Use the Right Spell Package for Each Target
At this stage, avoid treating every enemy as though it requires your maximum possible damage.
Weak enemies should be handled with an economical sequence. Durable enemies can justify additional damage-over-time effects or direct-damage spells. Dangerous enemies may require defensive preparation and more careful control.
The best sequence is the one that produces a reliable result at a reasonable cost.
Review Your Equipment Regularly
Look for meaningful upgrades rather than replacing items automatically.
Spell-related attributes may help your offensive performance, while Stamina can support survival. The relative value of different attributes depends on the current game mechanics and your specialization.
If a new item improves one statistic but sacrifices another, consider whether the trade-off benefits your actual playstyle.
Continue Using Group Content Selectively
Dungeons can provide experience, equipment, and a change of pace from solo questing.
However, group content introduces additional considerations.
You must coordinate with other players, respect the tank’s target selection, avoid unnecessary threat, and use your abilities in ways that support the encounter.
A Warlock’s utility can be valuable, but using control or area damage at the wrong time can complicate the fight.
Choose group activities when they provide a meaningful benefit rather than assuming they are always faster.
15. Levels 50–60: The Final Stretch Toward Maximum Level
The final ten levels are where preparation begins to matter more.
You are close to maximum level, but the experience required to advance can still be substantial. Stronger enemies, longer quest chains, and more demanding encounters may punish inefficient play.
The solution is not to rush every fight. It is to preserve a reliable leveling routine and reduce avoidable downtime.
More info: https://docs.google.com/presentation/d/1v_uCb2dQvde37ZAgmE5dMhrw_-3BSqf-ViJhYjLGJmY/edit?usp=sharing
Focus on Suitable Experience Sources
Choose quests and enemies that match your level, equipment, and current capabilities.
If an area contains many dangerous enemies or requires repeated travel, consider whether another suitable area would provide a better overall experience rate.
Do not judge a zone only by the number of enemies it contains. Quest completion, travel time, competition, and recovery all affect efficiency.

Refine Your Talent Build
Review whether your current talents support your intended approach.
If you plan to continue soloing, value reliable damage, control, and survival. If you intend to spend more time in dungeons, consider how your build supports group encounters and the abilities you will use most often.
Do not respecialize simply because another build is popular. Make changes when you understand what they improve and why.
Prepare for Level 60
As you approach the cap, begin thinking about what you want to do next.
You may want to continue questing, participate in dungeons, collect equipment, develop professions, or explore group content.
Your leveling build can provide a foundation, but endgame activities may reward different talent choices and equipment priorities.
Use the final levels to learn your class thoroughly rather than treating level 60 as the only meaningful objective.
16. Choosing the Best Equipment and Stats for Warlock Leveling
Equipment affects your damage, survivability, and ability to handle difficult encounters.
The best item is not necessarily the one with the highest item level or the most visually impressive appearance. What matters is how its attributes support your current build.
Spell Damage and Offensive Attributes
Spell-related attributes can improve your offensive performance depending on the current implementation.
Their value depends on the spells you use and the rules governing those spells.
A build that relies heavily on damage-over-time effects may evaluate equipment differently from a build that emphasizes direct damage.
Before choosing an item, identify which spells account for most of your actual damage and which statistics improve those spells.
More info: https://www.google.com/collections/s/list/wFrlmTqMI6-45jBH7VPKBQ/xfoC2oN2wIw
Intellect and Mana Capacity
Intellect traditionally contributes to Mana capacity and may influence other spellcasting-related mechanics depending on the version.
Additional Mana can provide more room to cast before recovery becomes necessary.
However, a larger Mana pool does not automatically make a character more efficient. If you spend too much Mana on unnecessary spells, additional capacity may simply delay the moment when you must recover.
Treat Intellect as part of a broader resource strategy.
Stamina and Survival
Stamina traditionally increases maximum health.
That can be useful when fighting dangerous enemies, learning unfamiliar encounters, or playing in situations where you may take unexpected damage.
A small increase in offensive power is not always better than a meaningful increase in survival.
If an item helps you survive encounters that previously forced you to recover or retreat, its value may extend beyond the statistics shown on the tooltip.
Spirit and Recovery
Spirit has traditionally been associated with resource regeneration, though exact mechanics and interactions can differ between versions.
Its value depends on the current rules and your normal recovery pattern.
If you frequently wait for resources between fights, regeneration-related attributes may be worth considering. If you rarely stop because your combat routine is already efficient, other statistics may provide more immediate value.
General Stat Evaluation
| Attribute category | Why it may matter | What to consider |
|---|---|---|
| Spell damage or relevant offensive stats | Improves damage under applicable mechanics | Which spells benefit and how often you cast them |
| Intellect | Traditionally increases Mana capacity | Whether a larger pool reduces meaningful downtime |
| Stamina | Traditionally increases health | Whether it improves survival against your current enemies |
| Spirit | Traditionally supports regeneration mechanics | Whether the current implementation makes it valuable for your routine |
| Other specialization-related stats | May improve a particular build | Check actual tooltips and current scaling |
This is a framework for evaluating equipment, not a fixed, verified stat-weight list for every Warlock build in WoW Forever.
Do Not Replace Equipment Blindly
When you obtain a new item, compare it with your current equipment.
Ask whether the change improves damage, Mana management, survival, or a combination of those factors.
An item with a slightly higher level may still be less useful if its attributes do not support your build. Conversely, a modest upgrade to a relevant statistic may provide a practical benefit over many encounters.
Use your own combat experience to confirm whether an equipment change is helping.
17. Questing Efficiently as a Warlock
Questing is a major part of leveling from 1 to 60.
The fastest approach is not necessarily to accept every quest in a region and complete them in the order they appear. Efficient questing requires you to consider geography, enemy difficulty, objective overlap, and the time required to return to quest givers.
Warlocks benefit from this planning because their combat style can be efficient when encounters are controlled and targets are selected carefully.
Group Nearby Objectives Together
If several quests require you to visit the same area, complete them together whenever practical.
This reduces unnecessary travel and allows you to defeat enemies while moving toward multiple objectives.
However, do not remain in an area simply because you have several unfinished quests if the enemies are too dangerous or the objectives require excessive backtracking.
Match Your Route to Your Character
Choose areas where ordinary enemies can be defeated reliably.
If you spend too much time recovering after each fight, consider whether your equipment, talent choices, or target selection need improvement.
Sometimes the most efficient solution is to return to an earlier area temporarily, complete easier objectives, or join a group for a difficult quest.
Prioritize Quest Clusters
A quest cluster is a group of objectives that can be completed in the same general area.
For example, a group of quests might require collecting items, defeating particular enemies, and visiting a nearby location. Completing these together can reduce travel time compared with returning to the quest giver after every objective.
This is a general planning method rather than a claim about a particular WoW Forever zone.
More info: https://linktr.ee/wowforevergold
Do Not Ignore Objective Competition
If many players are farming the same enemies, your progress may slow down.
Instead of repeatedly waiting for a specific target to appear, consider whether another quest or area offers comparable experience.
The best route can change depending on server population and the time of day.
A Simple Questing Efficiency Model
TOTAL QUESTING TIME

Travel Time             ███████
Combat Time             ██████████
Objective Interaction   ███
Waiting or Competition  ███
Recovery Time           █████

POTENTIAL IMPROVEMENTS

Group nearby objectives together
Choose enemies appropriate to your level
Reduce unnecessary spell casts
Avoid repeated deaths
Limit unnecessary city trips
Switch areas when competition becomes excessive
This graph is illustrative rather than a measured analysis of actual server data.
Know When to Leave an Area
A good leveling route should remain flexible.
If the enemies are too strong, the objectives are spread too far apart, or competition is making progress slow, consider moving elsewhere.
A route that is theoretically optimal on paper may not be optimal on a crowded server.
Your goal is to maximize useful progress, not to follow a predetermined path regardless of circumstances.
18. Dungeon Leveling as a Warlock
Dungeons offer an alternative to solo questing and can provide experience, equipment, group practice, and opportunities to use Warlock utility.
They are not automatically the fastest way to level. A dungeon’s value depends on the group’s performance, the difficulty of the encounters, travel time, waiting time, and the rewards available.
Understand Your Role
Warlocks generally contribute ranged damage and may provide utility through their class abilities.
Your responsibilities include dealing damage, following the group’s target selection, managing threat, and using control abilities appropriately.
You should also understand when not to cast.
A powerful area-damage spell may be inappropriate if the tank has not established control over the enemies. A crowd-control effect may be valuable if it removes a dangerous enemy from the fight, but unnecessary damage to that target may break the effect if the ability works that way.
Coordinate With the Tank
Allow the tank to establish control before committing to high-threat damage.
If the group is fighting several enemies, focus on the intended target unless the group has agreed on another plan.
Avoid repeatedly switching targets and applying effects to enemies that the tank is not currently controlling.
Good target discipline improves group stability and reduces unnecessary damage taken by other players.
Use Utility When It Matters
Warlocks can offer utility beyond damage, depending on the abilities available in the current version.
Learn which abilities are useful against particular enemy types and which restrictions apply.
More info: https://bandcamp.com/wowforevergold
Do not assume that a control ability works against every enemy. Do not use an ability with a long cooldown merely because it is available if the encounter does not benefit from it.
Dungeon Preparation Checklist
Before joining a dungeon, consider the following:
- Have you trained the important spells available at your level?
- Is your equipment appropriate for the content?
- Do you have enough Mana and health recovery options?
- Do you understand your main damage spells?
- Do you know how to manage your demon in a group?
- Can you follow target calls and avoid unnecessary threat?
- Do you understand any utility abilities that may be useful for the group?
You do not need to know every encounter perfectly before joining a group, but you should be willing to communicate, learn, and follow instructions.
Is Dungeon Spam Faster Than Questing?
There is no universal answer.
Dungeons may be efficient when the group moves quickly, avoids unnecessary deaths, and gains useful experience and equipment.
Questing may be more efficient when groups take a long time to form, the dungeon is difficult, or nearby objectives provide consistent progress.
Compare the entire activity rather than focusing only on the experience earned from individual enemies.
19. Professions, Consumables, and Gold Management
Professions and consumables can support your leveling journey, but they should not become distractions from the main objective.
A good profession choice can help you earn gold, gather materials, or create useful equipment. Consumables may improve survival or combat performance where their effects are available.
The right approach depends on your budget and whether you prefer convenience, crafting, gathering, or making money through the game’s economy.
Gathering Professions
Gathering professions can provide materials that you can sell or use in other professions.
Their main advantage is that they can be developed while exploring the world, allowing some economic progress to happen alongside questing.
However, gathering is not free. Traveling to remote resource locations, competing with other players, and repeatedly interrupting a quest route can reduce the experience you earn per hour.
Gather when resources are nearby or when the materials have a meaningful value to you.
Crafting Professions
Crafting professions may allow you to create equipment, consumables, or other useful items depending on the profession and game version.
Before investing heavily, compare the costs of materials with the price of the finished product and the value it provides.
A crafted item is not automatically better than a quest reward or a reasonably priced item from another player.
First Aid and Recovery
If First Aid is available under the current rules, it may provide useful recovery options between encounters.
Check the profession’s actual behavior in your version and learn which items are worth carrying.
Do not assume that every profession recipe or healing interaction works exactly as it did in an older version of the game.
Cooking and Food
Food can provide recovery or other benefits depending on its type and the game’s current mechanics.
If a food effect is useful and inexpensive, keeping a supply can support longer leveling sessions.
Compare the benefit with the cost rather than purchasing every consumable simply because it is available.
Manage Your Gold Carefully
Warlocks have several reasons to spend money during leveling, including spell training, equipment, professions, and travel-related expenses.
Avoid purchasing minor equipment upgrades that you will replace almost immediately unless they solve a real problem.
Keep a reasonable reserve for essential training and future needs.
If you gather materials or craft items, compare the time required with the value you receive. A profitable activity on paper may not be worthwhile if it interrupts your leveling route too often.
A Practical Spending Priority
- Essential spell and ability training.
- Equipment upgrades that make a meaningful difference.
- Necessary travel or progression costs.
- Useful consumables for difficult content.
- Profession investments that support a clear goal.
- Optional equipment or cosmetic purchases.
The exact order depends on your situation, but the principle remains the same: spend money where it produces a useful improvement.
20. Common Warlock Leveling Mistakes and How to Avoid Them
Even a well-designed build can perform poorly if the player makes avoidable decisions.
The following mistakes are particularly important to recognize because they can create unnecessary recovery, failed pulls, or wasted resources.
Mistake 1: Applying Too Many Damage-Over-Time Effects
Not every enemy needs your complete spell package.
If the target will die before the effects deliver most of their damage, additional applications may waste Mana and casting time.
Better approach: Estimate how long the target is likely to survive and use the spells that provide enough value for that encounter.
Mistake 2: Treating Life Tap as Free Mana
Life Tap can help maintain your casting resources, but the health cost matters.
Using it carelessly before a dangerous fight can leave you vulnerable.
Better approach: Check your health and surroundings before exchanging health for Mana. Recover first when the encounter demands it.
Mistake 3: Ignoring Your Demon
A demon that is taking excessive damage or failing to control enemies can undermine your entire combat plan.
Better approach: Monitor its condition, choose a suitable companion, and understand its abilities.
Mistake 4: Overusing Expensive Direct Damage
Direct damage can be useful, but casting expensive spells against every ordinary enemy may create unnecessary downtime.
Better approach: Use direct damage when it meaningfully improves the outcome, especially against durable or dangerous targets.
Mistake 5: Pulling Too Many Enemies
Multiple enemies can create more incoming damage and more complex threat management.
Better approach: Increase pull size gradually and only when you understand how your current build handles the extra pressure.
Mistake 6: Fighting Enemies That Are Too Difficult
An enemy that takes too long to defeat may provide poor experience for the time and risk involved.
Better approach: Choose suitable targets, group for difficult objectives, or return when your character is stronger.
Mistake 7: Neglecting Spell Training
New spell ranks and abilities may improve your combat performance.
Better approach: Visit trainers when practical and compare the value of new training with your available gold.
Mistake 8: Buying Every New Item
Minor equipment upgrades can consume gold that would be more useful elsewhere.
Better approach: Compare actual attributes and buy upgrades that solve a problem or provide a meaningful improvement.
Mistake 9: Ignoring Positioning
Starting a fight near additional enemies can turn an ordinary encounter into an uncontrolled pull.
Better approach: Check the surroundings and leave room to move before engaging.
Mistake 10: Assuming One Rotation Fits Every Enemy
Different targets have different health, abilities, and resistances.
Better approach: Adjust your spell selection to the target rather than following a rigid sequence.
Mistake 11: Using Crowd Control Without Understanding It
Some control effects have restrictions, break under certain conditions, or do not affect particular enemies.
Better approach: Learn the ability’s actual behavior before relying on it in a dangerous encounter.
Mistake 12: Treating Dungeon Damage as the Only Goal
In a group, uncontrolled threat or inappropriate spell use can create problems for everyone.
Better approach: Follow the group’s plan, coordinate with the tank, and use utility when it benefits the encounter.
Mistake 13: Following an Outdated Build Without Checking It
WoW Forever may change abilities and talents from earlier versions.
Better approach: Verify current tooltips and talent behavior before copying a build exactly.
Mistake 14: Never Reviewing Your Own Performance
If every encounter feels expensive or dangerous, continuing without changes may preserve the same problem for dozens of fights.
Better approach: Identify whether your main issue is Mana, health, demon control, spell selection, equipment, or target difficulty.
Mistake 15: Confusing Fast Combat With Fast Leveling
A rapid kill is not necessarily efficient if it requires a long recovery afterward.
Better approach: Measure success by consistent progress across multiple encounters, not only by the speed of one kill.
21. Improving Your Leveling Speed: A Repeatable System
The most effective Warlock leveling system is one you can repeat without unnecessary risk or complicated decisions.
You do not need to optimize every individual spell cast. Instead, establish a routine that makes the majority of encounters predictable.
Before Combat
Check your health, Mana, demon, target, and surroundings.
Decide whether the enemy is appropriate for your current condition.
If the target is dangerous, prepare more carefully. If it is an ordinary enemy, avoid spending unnecessary time on preparation.
During Combat
Let your demon perform its intended role.
Apply useful spells, monitor threat, and adapt to the target’s remaining health.
Do not keep casting an effect simply because it is part of your usual rotation. If the target is nearly defeated, consider whether another cast is necessary.
After Combat
Review your resources and decide whether to recover.
If your health is low, avoid using Life Tap without considering the risk. If your Mana is low but your health and surroundings are safe, choose a suitable recovery method.
Move to the next objective once you are ready.
Evaluate Your Session
After several encounters, consider whether the routine is working.
Are you spending too much time recovering? Are you repeatedly losing demon control? Are you fighting enemies that take too long to defeat? Are you traveling farther than necessary between quests?
Make one meaningful adjustment at a time.
This makes it easier to identify what actually improves your performance.
Efficiency Model
A conceptual model for leveling efficiency is:
Useful progression per hour = meaningful experience gained ÷ total time spent.
Total time includes combat, travel, recovery, waiting, and time lost to failed encounters.
This explains why the highest-damage build is not always the fastest leveling build. A build that deals slightly less damage but survives consistently may deliver more progress across a full session.
Leveling Efficiency Graph
RELATIVE IMPACT ON LEVELING EFFICIENCY

Good target selection       ██████████
Efficient spell usage       ██████████
Demon control               █████████
Reduced downtime            █████████
Quest route planning        ████████
Suitable equipment          ███████
Talent synergy              ███████
Avoiding unnecessary deaths ██████████
Minor damage optimization   █████
This graph illustrates general priorities; it is not based on measured WoW Forever performance data.
22. How to Adapt Your Warlock to Different Enemy Types
Different enemies create different problems, so a single strategy will not be equally effective everywhere.
Understanding enemy behavior helps you choose spells, demons, and positioning more intelligently.
Melee Enemies
Melee enemies generally need to approach you before dealing their normal close-range attacks.
This can give you time to begin dealing damage while your demon engages them.
However, do not assume that every melee enemy is harmless at range. Some have charges, ranged abilities, or other mechanics that can change the encounter.
Choose enough space to react if the enemy reaches you sooner than expected.
Spellcasters
Spellcasters may deal damage from range and can sometimes create dangerous situations if allowed to cast freely.
Your approach should depend on the enemy’s actual abilities and the utility available to your Warlock.
Positioning, suitable demon selection, and relevant control or interruption tools may help, where supported by the current mechanics.
Avoid assuming that every caster can be interrupted or controlled.
Enemies With High Health
Durable enemies are often better candidates for damage-over-time effects because they may survive long enough for those effects to deliver substantial damage.
They also give you more time to evaluate how your rotation performs.
However, high health does not necessarily mean low danger. If the enemy deals heavy damage, you must account for the length of the encounter and your demon’s ability to survive it.
Groups of Enemies
Groups require more planning because every additional enemy can contribute damage or other disruptive effects.
Start with manageable encounters until you understand your current build.
If the group is too strong, separate the enemies where possible or choose a different target.
Elite and Quest Boss Enemies
Elite enemies often deserve more preparation than ordinary creatures.
Check your health, Mana, demon, and surroundings before beginning. If the encounter is beyond your current capabilities, seek help or return later.
Do not judge the fight only by the enemy’s level. Its abilities, health, and damage can matter just as much.
More info: http://kronosgold.net/ultimate-wow-forever-gold-guides-directory-part-two.pdf
23. Playing Warlock With Other Classes
Warlocks can benefit from group play because their damage and utility can complement other classes.
However, group effectiveness depends on coordination.
With a Tank
A tank helps keep enemies focused on the appropriate target.
Give the tank time to establish control before using high-threat attacks. Follow target selection and avoid spreading damage across enemies the group is not ready to handle.
With a Healer
A healer can support longer or more demanding encounters, but you should not assume that the healer can compensate for every mistake.
Avoid unnecessary damage, control your demon, and manage your resources so the group can focus on the encounter rather than correcting preventable problems.
With Other Damage Dealers
Coordinate your target selection and use utility where it helps the group.
If another player is controlling an enemy, understand whether your attacks might interfere with that effect.
Good communication can improve group performance more than a small theoretical increase in personal damage.
In Mixed Groups
Different classes have different strengths.
A group may benefit from a mixture of damage, healing, tanking, control, and utility. Your job is to contribute effectively without trying to perform every role at once.
A Warlock who deals consistent damage, manages threat, and uses utility appropriately can be more valuable than one who focuses exclusively on personal damage numbers.
24. Race Selection and Starting Your Warlock
Race selection can affect the opening experience through starting location, racial abilities, available character options, and personal preference.
The available races and their exact racial effects should be checked in the current WoW Forever character-creation system.
Do not assume that every race has identical options or that all racial abilities remain unchanged from older versions.
Choose a Race You Enjoy Playing
You will spend many hours with your character, so appearance, starting location, and personal preference are legitimate considerations.
A theoretical racial advantage is only one part of the decision.
Consider Starting Location
Some starting areas may suit your preferred questing route or provide convenient access to nearby objectives.
The value of a starting location depends on the current quest layout, server population, and the routes available to your character.
More info: https://kronosgold.net/ultimate-wow-forever-gold-guides-directory-part-three.pdf
Verify Racial Abilities
Read the actual racial ability descriptions available during character creation or in the game.
If a racial ability provides a useful defensive or offensive effect, consider how often it will matter during your leveling journey.
Avoid selecting a race based on outdated information from a different game version.
Does Race Determine Your Leveling Speed?
Race can influence particular situations, but your general leveling efficiency will also depend heavily on your spell usage, demon control, target selection, equipment, and route planning.
A player who uses a sensible combat routine with a preferred race may progress more efficiently than someone who chooses a supposedly optimal race but repeatedly wastes resources.
25. Warlock Leveling in PvP-Enabled Areas
Even when your main objective is reaching level 60, you may encounter other players in areas where PvP is enabled.
Your preparation should focus on awareness and the ability to leave dangerous situations rather than assuming every encounter will be a fair fight.
Maintain Situational Awareness
Avoid becoming so focused on your rotation that you ignore nearby players or the surrounding environment.
Pay attention to your health, Mana, demon, and available escape routes.
Do Not Waste Every Resource on Ordinary Enemies
If you are in an area where unexpected combat is possible, consider whether you should retain enough resources to respond to a sudden threat.
This does not mean you must always keep everything at maximum. It means you should understand the risk of entering a dangerous situation with limited options.
Recognize When to Disengage
Not every encounter is worth pursuing.
If a situation becomes unfavorable, prioritize survival and return to your objectives when it is safe to do so.
The ability to recognize a bad situation is part of efficient play because repeated unnecessary deaths can erase much of the progress made during a session.
26. Preparing for Level 60: From Leveling Character to Endgame Warlock
Reaching level 60 is an important milestone, but it is also the beginning of a new set of decisions.
Your priorities may change depending on whether you want to focus on dungeons, raids, solo content, professions, farming, or PvP.
A leveling build should prepare you to understand your class, but it does not necessarily represent the ideal build for every endgame activity.
Review Your Talents
Look at your current specialization and decide what role you want to perform.
An Affliction-oriented build may suit activities where sustained damage is valuable. A Demonology-oriented build may appeal to players who want to emphasize demon-related mechanics. A Destruction-oriented build may be appropriate when direct spell damage fits the encounter.
The correct choice depends on the actual game mechanics and the content you plan to play.
More info: https://kronosgold.net/news-wow-forever-professions-the-ultimate-guide-to-crafting-gathering-gold
Improve Your Equipment Gradually
Identify the statistics that support your intended role.
Do not replace every item immediately simply because you have reached maximum level. Prioritize upgrades that provide meaningful improvements.
Use dungeon rewards, quests, crafting, and other available activities to build a more suitable set of equipment.
Learn Encounter Requirements
Different encounters reward different forms of preparation.
Some may demand sustained damage. Others may require careful target switching, utility, crowd control, or disciplined resource management.
Your leveling experience gives you a foundation, but you should continue learning how your spells and demon interact with the content you choose.
Build a Sustainable Routine
At level 60, the same general principles remain useful:
- Choose talents that support your intended role.
- Understand the spells you use most often.
- Manage health and Mana intelligently.
- Control your demon.
- Evaluate equipment based on its actual benefits.
- Coordinate with your group.
- Adapt when an encounter requires a different approach.
The strongest Warlock is not simply the one with the largest damage number. It is the one who understands how to contribute consistently to the content being played.
More info: https://kronosgold.net/news-wow-forever-city-of-dalaran-dungeon-guide-quests-and-arcane-secrets
27. A Complete Warlock Leveling Checklist
Use this checklist to review your preparation as you progress from level 1 to 60.
Before Starting a Session
- Check your health and Mana.
- Check your demon and its condition.
- Review your available spells.
- Make sure your equipment suits your current level and goals.
- Identify suitable quests or enemies.
- Plan a route that minimizes unnecessary travel.
- Carry appropriate recovery items when useful and affordable.
Before Each Difficult Encounter
- Inspect the enemy and surrounding area.
- Determine whether additional enemies may join.
- Choose a suitable demon.
- Check whether your health and Mana are sufficient.
- Identify any relevant control or utility abilities.
- Consider whether grouping would be more efficient.
- Avoid starting the encounter if the risk is disproportionate to the reward.
During Combat
- Allow your demon to perform its intended role.
- Apply useful spells rather than every spell automatically.
- Monitor your own health and Mana.
- Watch your demon’s condition.
- Avoid unnecessary threat.
- Adjust your rotation to the enemy’s remaining health.
- Use control or defensive abilities when appropriate.
After Combat
- Check your remaining resources.
- Recover if the next encounter requires it.
- Avoid using Life Tap carelessly.
- Review whether you spent too much Mana.
- Consider whether your target selection was efficient.
- Move toward the next objective when ready.
More info: https://kronosgold.net/news-wow-forever-dungeon-guide-21-tips-for-groups-bosses-and-epic-loot
Every Few Levels
- Visit a trainer when practical.
- Review new spells and available ranks.
- Read your talent tooltips.
- Compare your equipment.
- Reassess your demon choice.
- Review your questing route.
- Identify the main source of downtime.
- Adjust your routine if the same problem keeps occurring.
More info: https://kronosgold.net/news-wow-forever-leveling-guide-21-tips-to-reach-level-60-faster
Approaching Level 60
- Decide what content you want to pursue.
- Review your specialization.
- Identify equipment upgrades that matter.
- Learn the requirements of your intended group activities.
- Keep improving your understanding of the class.
- Treat leveling experience as preparation for the next stage.
28. Frequently Asked Questions About WoW Forever Warlock Leveling
What Is the Best Warlock Specialization for Leveling From 1 to 60?
Affliction is a strong specialization to evaluate first for solo leveling because damage-over-time effects can support sustained damage and efficient movement between targets. However, the best choice depends on current WoW Forever mechanics, available talent changes, and your preferred playstyle.
Demonology and Destruction can also be viable approaches. Check the current talent tooltips and assess how each build performs in the content you actually play.
Is Affliction Good for Solo Leveling?
Affliction is traditionally well suited to sustained solo combat because damage-over-time effects can continue working while you perform other actions.
Its efficiency depends on applying the right effects to the right targets. Excessive spell applications can waste Mana, especially when enemies die quickly.
Should I Level as Demonology?
Demonology is worth considering if you enjoy demon-centered gameplay or want to build around the demon-related talents available in your version.
Its effectiveness depends on the current talent tree, demon abilities, and the type of content you are doing.
Is Destruction Viable for Leveling?
Destruction can be a viable option for players who prefer direct spell damage.
The main consideration is resource management. If your spells cost substantial Mana relative to the time they save, you may spend too much time recovering between fights.
Which Demon Should I Use While Leveling?
The Voidwalker is a traditional choice to consider for defensive support during solo questing. The Imp, Succubus, and Felhunter may be useful in different situations depending on their available abilities and the current game rules.
Choose the demon that best supports the encounter rather than assuming one companion is always superior.
Should I Use Life Tap After Every Fight?
No. Life Tap should be used according to your health, Mana, and surroundings.
It can help restore Mana, but the health cost matters. Before using it, consider whether you are safe and whether you have enough health to handle the next encounter.
Should I Apply Every Damage-Over-Time Spell to Every Enemy?
No. Use damage-over-time effects when the target is likely to survive long enough for them to provide useful damage.
Against weak enemies, a smaller spell package may be more efficient. Durable enemies may justify additional effects.
Is Multi-Target Pulling Faster Than Fighting One Enemy at a Time?
Sometimes, but not always.
Multiple enemies can increase incoming damage and make threat management more difficult. Larger pulls are worthwhile only when your build can handle the added pressure without excessive recovery or risk.
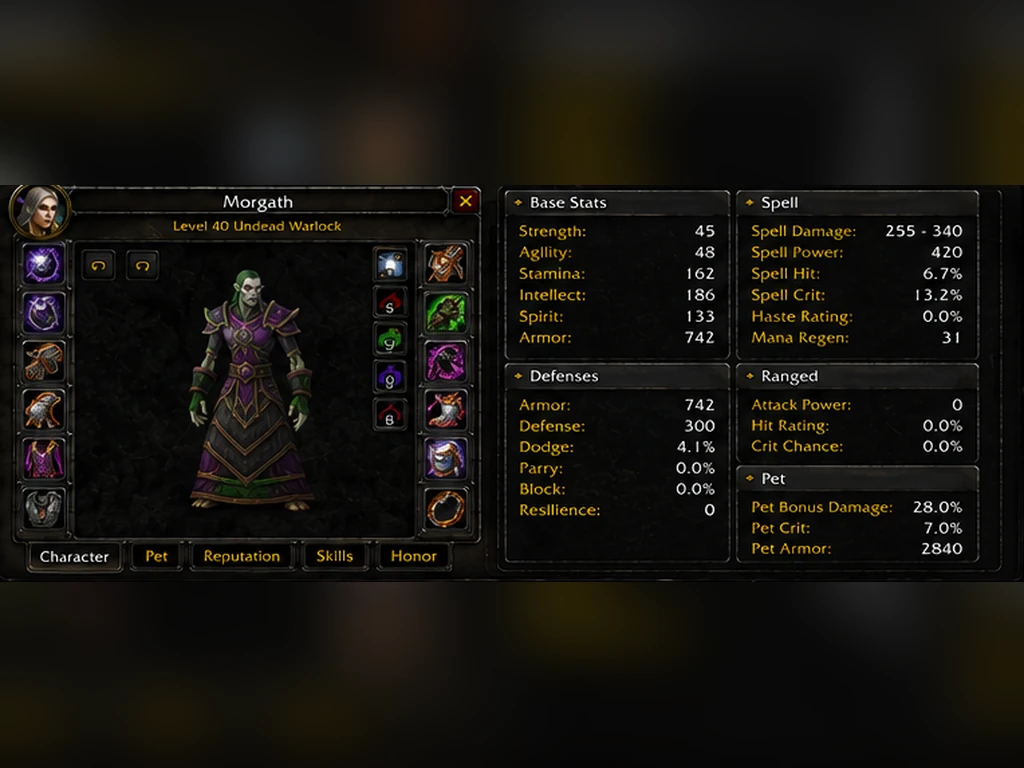
What Stats Should a Leveling Warlock Prioritize?
Evaluate the offensive attributes relevant to your specialization, Mana capacity, survival, and regeneration according to the current game mechanics.
The exact priority depends on your build and the spells you use most frequently. Do not treat a generic stat ranking as universally correct for every version.
Are Dungeons a Good Way to Level a Warlock?
Dungeons can provide experience, equipment, and group practice.
Whether they are faster than questing depends on group performance, waiting time, travel, encounter difficulty, and rewards.
Should I Buy Every New Spell Rank?
Not necessarily. Review new training and prioritize abilities that meaningfully improve your combat routine.
Your budget should also account for equipment, travel, and other necessary expenses.
Which Profession Is Best for Warlock Leveling?
There is no single best choice for every player.
Gathering professions may support gold generation, while crafting professions may provide useful items or equipment. Consider the cost, time investment, and practical value of each profession.
How Can I Reduce Downtime?
Start by identifying the source of downtime.
If Mana is the problem, reduce unnecessary spell casts and evaluate your resource-management habits. If health is the problem, improve positioning and demon control. If travel is the problem, organize nearby objectives into a more efficient route.
Why Does My Demon Keep Losing Threat?
Your damage may be exceeding the demon’s ability to hold the enemy’s attention, or the encounter may involve other factors that affect threat.
Allow the demon to establish control where appropriate, understand its abilities, and adjust your damage or target selection when necessary.
Does the Best Leveling Build Also Work at Level 60?
Not automatically.
A build designed for solo leveling may differ from one intended for dungeons, raids, farming, or PvP.
Evaluate your level-60 goals and adjust your talents and equipment accordingly.
Can I Follow a Classic Warlock Guide Exactly?
Use traditional Warlock guides as general background, not as unquestionable instructions.
WoW Forever may alter talents, abilities, scaling, and other mechanics. Verify the current client tooltips and adapt the advice to your version.
29. The Most Important Principles for Fast Warlock Leveling
If you remember only a few lessons from this guide, remember these.
First, choose your spells according to the target. Damage-over-time effects are valuable when they have enough time to work. Avoid spending Mana on effects that will contribute little before the enemy dies.
Second, treat your demon as part of your combat strategy. Choose a companion that suits the encounter, monitor its condition, and understand how to control it.
Third, manage Health and Mana together. Life Tap can help maintain Mana, but its health cost must be considered before difficult fights.
Fourth, control the size of your pulls. Defeating several enemies at once can be efficient, but only when the additional pressure is manageable.
Fifth, prioritize consistent progress over impressive individual fights. A routine that produces reliable kills and limited recovery can be more effective than a burst-heavy approach that repeatedly leaves you depleted.
Sixth, plan your questing route. Group nearby objectives, avoid unnecessary travel, and change areas when competition or enemy difficulty makes your current route inefficient.
Seventh, choose talents and equipment based on your actual build. Do not assume that every popular recommendation is correct for your current version of WoW Forever.
Finally, continue adapting. Your character, enemies, equipment, and available abilities change as you level. The best strategy at level 12 may not be the best strategy at level 42.
30. Final Thoughts: Mastering the Journey From Level 1 to 60
Warlock is a class that rewards planning, resource awareness, and deliberate control.
Its strength comes from combining several systems: sustained damage, direct spellcasting, demonic companions, health and Mana management, and utility that can help shape an encounter.
When these systems work together, leveling becomes a repeatable process rather than a sequence of disconnected fights.
The most effective Warlock does not cast every available spell simply because it is ready. The most effective Warlock understands which spells are appropriate for the target, which demon suits the situation, how much health and Mana the next encounter requires, and when it is better to recover or choose a different enemy.
Affliction is a strong starting point to evaluate for solo leveling, while Demonology and Destruction offer alternative approaches that may suit different players and current game mechanics. Whichever specialization you choose, learn its strengths, read the actual tooltips, and build a routine around the abilities that provide real value.
From the opening levels to the final stretch toward 60, focus on efficient spell usage, reliable demon control, suitable equipment, sensible quest routing, and avoiding unnecessary downtime.
The result is a more consistent leveling experience and a stronger understanding of the class you will continue playing after reaching maximum level.
Master the demon, manage your resources, choose your targets carefully, and make every encounter count.
Navigation:
Next: https://wow-forever.gold/news/blog/wow-forever-priest-leveling-guide-1-60/
Previous: https://wow-forever.gold/news/blog/guides/wow-forever-mage-leveling-guide-1-60/
PvP (US) | PvP (EU) | PvE (US) | PvE (EU) | RP (US) | RP (EU) | Hardcore (US) | Hardcore (EU) | Accounts | Powerleveling